We want to choose our own browser!
By Arjan Pater
- 912
- PowerShell ,
- 28 Jun
On one day my customer asked me to do interviews with the users. The customer wanted to know what is the most wanted feature the users would like to see for their workplace. And by that, he didn’t mean better coffee facilities. No, they were looking for a better usability and user experience of the workplace.
The customer had Internet Explorer as their standard company browser, but Google Chrome and Mozilla Firefox were also supplied to the users. The users were pleased that they could choose their own favorite browser. However, there was no easy way to set that browser as their own default browser.
Giving more control to the users to have a better usability is a new trend in the industry. The old way of being in full control of the workplace is long over. Users want more control. Therefore, Bring Your Own Device is very popular.
But before we stray from the subject at hand, let’s go back to the default browser and the users’ wish to select their own default standard browser. I needed to build a program to set the default browser to improve the user happiness. What do I need and where to begin. I suppose I need to explain the boundaries of this post.
- We need to know something about the mechanism that makes the preferred browser the default browser.
- We need to create an interface that’s simple enough for the user to understand.
- A program written in a code language behind the interface is needed.
- The settings have to be saved for every user.
- All the browsers are configured by policies and/or configuration files. The popup where users are asked to set the browser as the default browser is disabled for every browser.
So far no problems. Let’s see how to do it. The customer uses terminal servers and standalone systems. They are all 64 bit Windows 7 and Windows 2008R2 operating systems. Thus, the main focus in this blog is on those operating systems.
The language that will be used is the scripting language PowerShell. The reason is simple. It’s a good language for manipulating operating systems, as it has the ability to build GUI’s and I would like to get somewhat more experienced with this language 🙂 Apart from some simple scripting rules, this will be my first PowerShell program. PowerShell is part of the Windows Management Framework. The version i am using is: Windows Management Framework 4.0. It can be downloaded here.
Let’s start with capturing the changes on a system at the time when a default browser is set. You could google the right keys for other browser as well. (Interested in how to capture system changes? Click here )

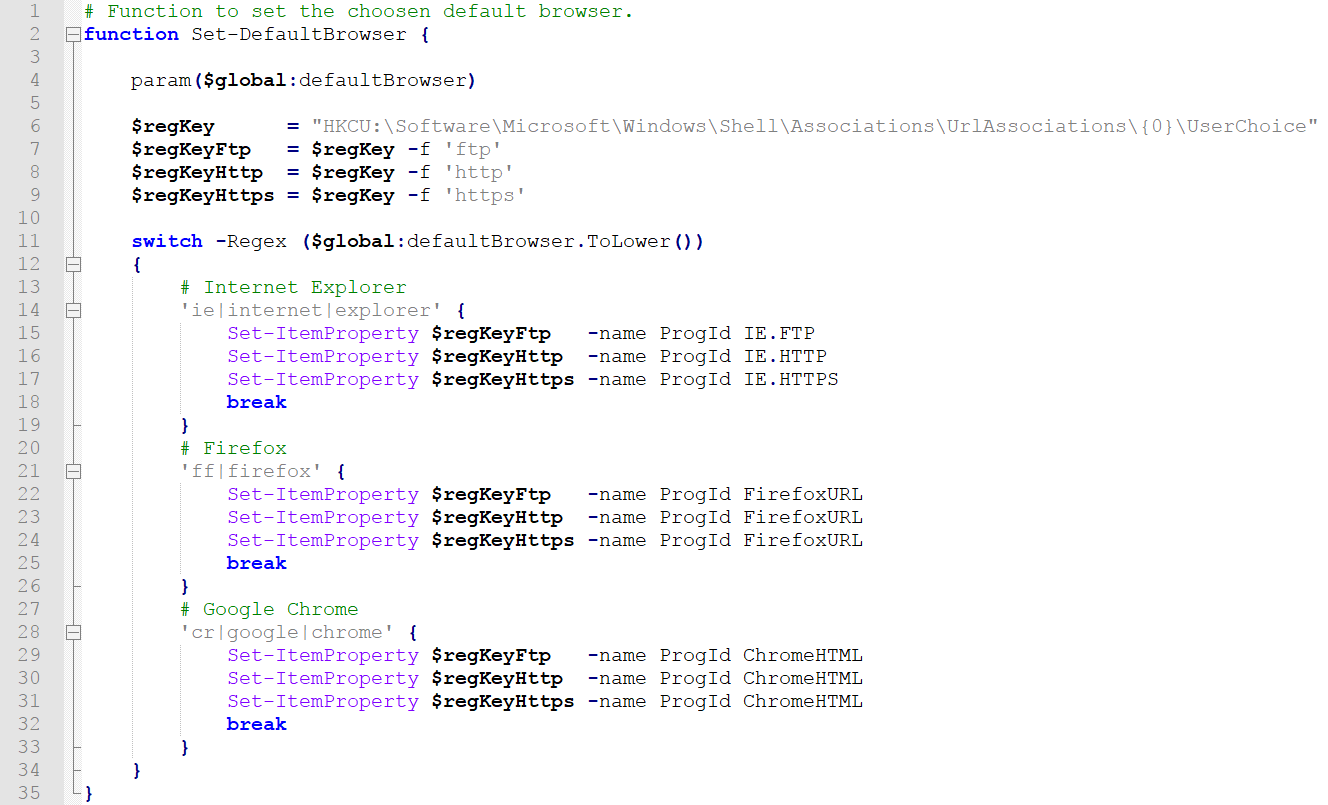
In the keys above the Firefox browser is the standard browser. I can do the same for Chrome and Internet Explorer. The "Progid" value has to be replaced with the following string values.
- Internet Explore (http):
IE.HTTP - Internet Explorer (https):
IE.HTTPS - Internet Explorer (ftp):
IE.FTP - Google Chrome (http):
ChromeHTML - Google Chrome (https):
ChromeHTML - Google Chrome (ftp):
ChromeHTML - Mozilla Firefox (http):
FirefoxURL - Mozilla Firefox (https):
FirefoxURL - Mozilla Firefox (ftp):
FirefoxURL
In PowerShell, I can create code that changes the registry keys to the values provided above when a button is pressed. The PowerShell function is showed below.
Now the fun starts. The browser of choice should open when the user opens a link in an email for example. So back to the registry. I have to change a user setting (not a system setting!) because I want to change the standard browser for a specific user account. This said, there are loads of these settings in "HKEY_CLASSES_ROOT". However, "HKEY_CURRENT_USER" will overrule and so I ended up with the following keys:

The Firefox browser uses "FirefoxURL", the other browsers use "ChromeHTML" (Chrome browser) and "IE.AssocFile.HTM" (Internet Explorer).
We just have to set the right registry keys here. Well now there is a snag. Although the User Account Control (UAC) is turned off, the "UserChoice" cannot be edited by “regedit” or by any other program. So, what is possible? It turned out that I can’t edit, but only delete the keys. Now there is another catch. The keys can’t be deleted by program, only by “regedit”. It’s somewhat weird that I as an administrator with full control am not allowed to edit the keys at all. To overcome this, I imported empty keys to replace all the values with empty values. Now it’s possible to write new keys and values again.
To do so, we now need to implement a function in PowerShell to import empty keys and write the desired values in the registry.
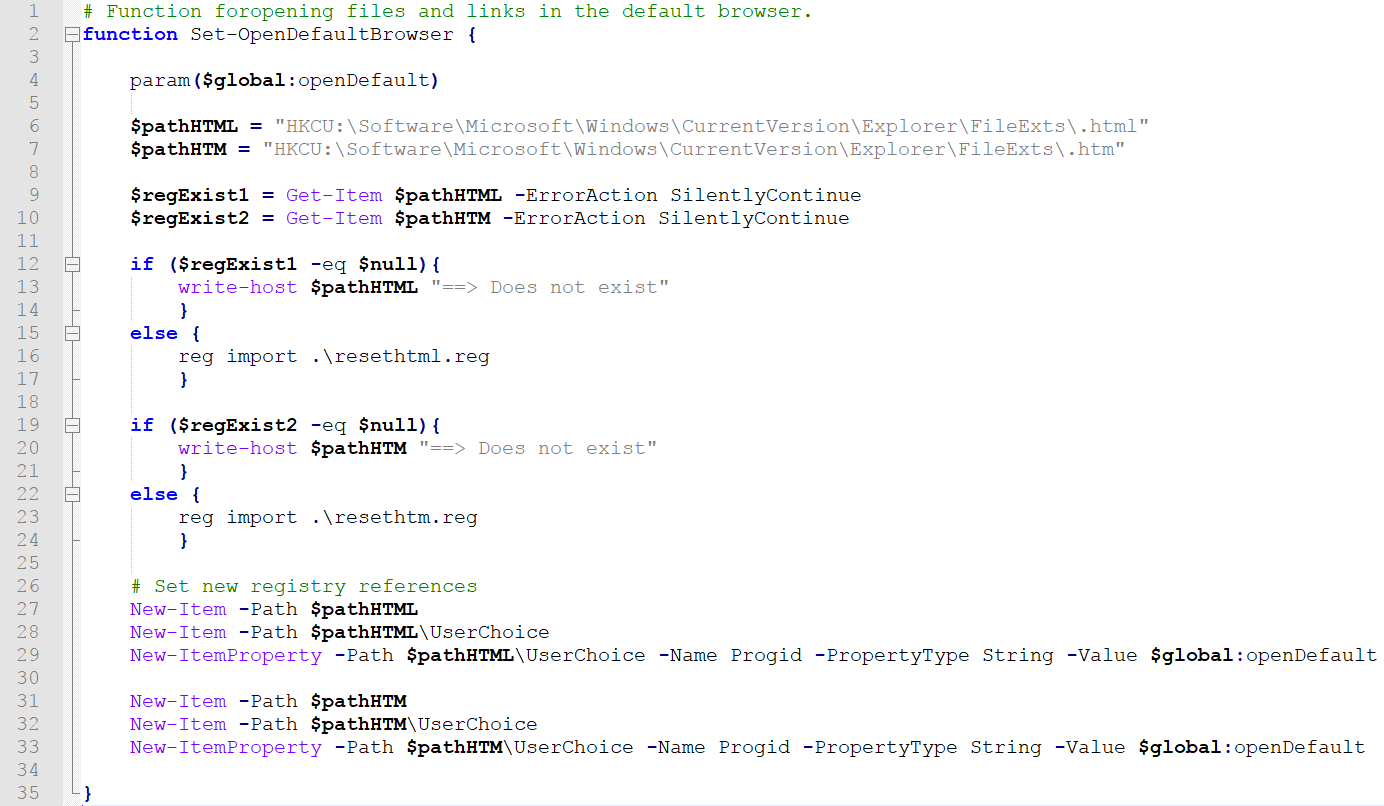
The above functions needed to set the default browser are created in PowerShell (please find the full PowerShell code in the download section), but there is still the need for a GUI for the end user. I found a good and useful article about building a GUI for PowerShell programs the
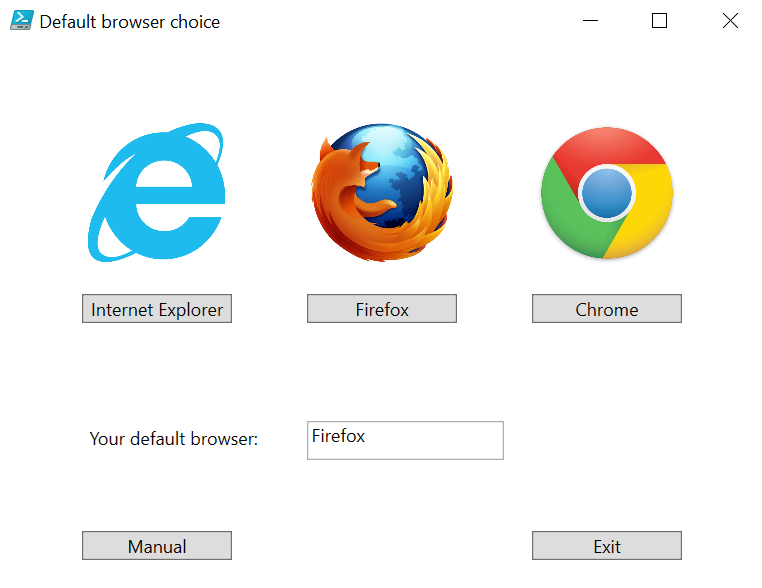
fast and easy way with Visual Studio Express (You find Visual Studio Express here; the article how to build a GUI is provided here.). After gathering some experience with using Visual Studio Express I ended up with the design shown on the right here.
For each browser, there is a button to choose it as your favorite browser which then is set as your default browser. Under the buttons, the current default browser is displayed. On the bottom of the screen, there is a button to open a manual for this program. Next to it, there is another button to exit this program.

In my opinion it’s always a good idea to create a manual. So I incorporated a button to open a manual (PDF-file) to explain users how this program works. This should saves some telephone calls to the service desk.

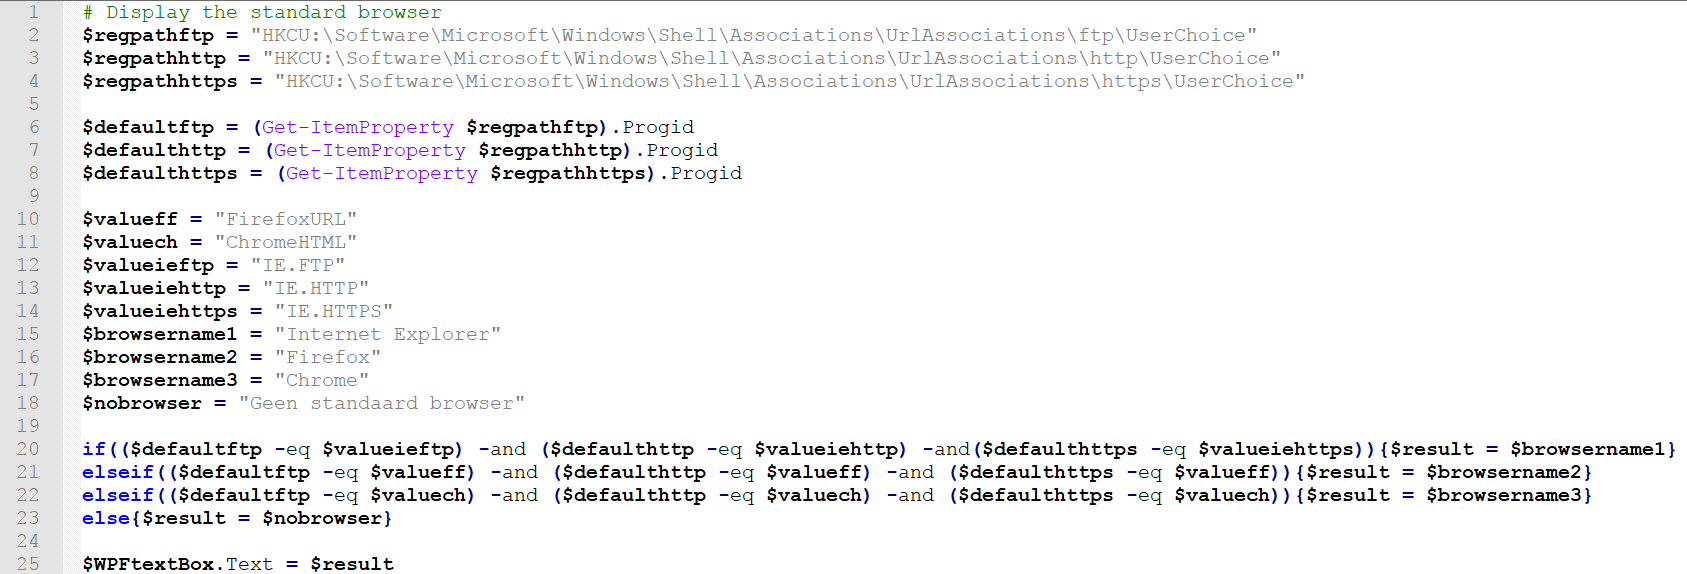
We need to show the users which browser is

set as default browser. The code behind this function reads out the value set from the Windows registry. In some cases, the keys may not be present or not set. In that case, there will be a message that there is no default browser set.

The exit button is important as well – it speaks for itself. The code behind the exit button is showed below.

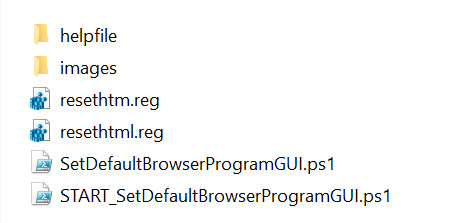
The folder and file structure of the program is implemented as follows: In the main folder, there are two PowerShell files. One represents the current program, the other is for starting the program. We need this because we don”t want to have a PowerShell screen visible behind our program. Moreover, the main folder contains two files with the keys to reset the values in the Windows registry. Next, there is a folder for the images used in the GUI and one for the help file.
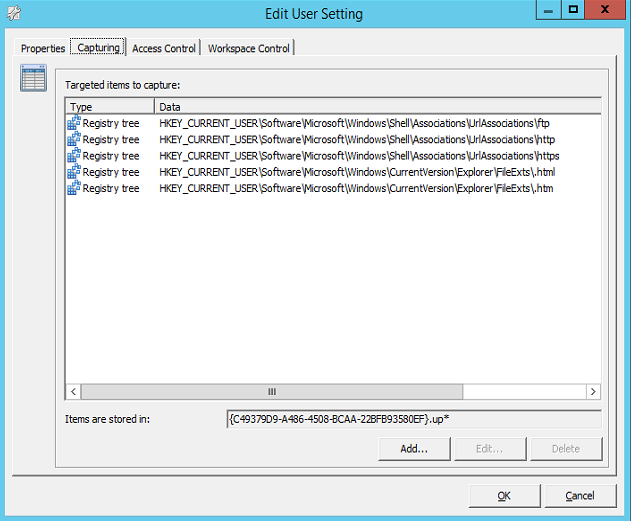
The changes in the registry keys made by the program have to be stored in the user profile – or they will get lost. The Windows workspace managers provide the option to do so. My customer is using RES Workspace Manager, but other workspace managers could be used as well, such as VMware User Environment Manager or AppSense. The workspace manager stores the designated user settings and makes these settings available to the user again when needed.
This is it. I have all the information available to build functions in PowerShell and link that to the GUI. Please visit the download section for the whole program.
This works very well on Windows 7 and the Windows Server 2008 architecture, but not on the newer versions of Windows. Microsoft changed a lot, in the way the default applications are set in later Windows versions. It has become more practical in comparison to the older Windows versions. Maybe something to write about in the future.